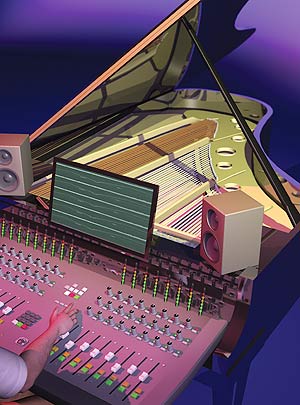

Mixing piano, no matter the genre, calls for your creativity as a mixer and the input of the production team as a guide. Creative discussions can center on the size of the instrument image in relation to the other parts. Is this a piano-centric production, or is the instrument a backdrop for other players? How do you want to treat the instrument when it comes to reverb, mood and panning? Is there an established style — retro or otherwise — that you want to emulate, or are you establishing a new stylistic beachhead? After you form ideas, it’s time to dig in. In this feature, I’ll talk about EQ scenarios along with tips on panning, automation, reverb, compression and dealing with instrument mechanics.
PANNING FOR PLATINUM
Illustration: Chuck Dahmer
Because of the piano’s wide note range, panning is a good first step toward crafting the track, and your reference should always be the other instruments. The wideness of the image can be determined by a few guidelines. The number one question to ask is, “What else is going on in the track?” Is the piano the star or does it offer a supportive role? The ideal solution might be panning it more to the center for a more dominant image or dynamically panning it throughout the song to keep your listeners’ focus from straying when the player chooses to play outside of center. (For an in-depth discussion on automated panning, see “Power Tip” on page 26.)
On the other hand, if the piano is supporting other instruments (for example, comping chords behind the melody), wider panning can offer a tonal “doughnut,” leaving a space in the center of your image for a vocal or another melodic instrument to shine. Keep in mind that panning hard-left and -right is extreme and can distract the listener, so take the time to get an accurate picture of how your panning impacts the ear by switching between near- and midfield speakers for focus, even referencing on headphones. Imaging that seems subtle over speakers can jump out when you put on a set of cans.
TONE IS KING
Because of its range and polyphonic nature, piano can take up a lot of room in a mix, which may or may not be a good thing, depending on its role. For instance, a bright piano layered with a vocalist can steal the thunder from the featured player. In this section, I’m going to address “appropriate” EQ, and by that I mean one that supports the timbre and overall feel of the mix. For example, some piano music needs to be “dark”: You may not necessarily want to hear a lot of sparkle on a moodier track. If darkness is the goal, then you’d bring down the “air,” meaning the overtones in the 20kHz range. One way to tone down the high end is to choose a high-shelf EQ at 17 to 20 kHz and lower the gain to match the track’s mood. Conversely, if the piano has “room” in a sparse mix or needs to speak more in the upper range because the track is already too dark, then use the same shelf EQ to add more overtones. Adding these particular frequencies can make the instrument shine in the mix without sounding harsh, especially if you add harmonics that are not in the “meat” of the piano’s range, between 275 and 4,186 Hz.
A good guide for your ear when you’re trying to add sparkle is to boost the 17 to 20kHz band with a shelf EQ until you can hear the “fuf-fuf-fuf” sound made when the felt dampers rise and lower off the strings as the player uses the sustain pedal. Keep in mind, though, that not all pianos are created equal: Some have dampers that are already quite loud, and bringing them out with EQ can detract from the performance. Once you’ve added some top, reference the piano in the overall mix and adjust accordingly.
In addition to the dampers’ mechanical sounds, pianos from various manufacturers differ in brightness because of the material used in the hammers and the types of strings used. There are even after-market tweaks that can change the tone and that will alter your EQ game plan. For instance, a brighter-sounding piano, perhaps one that has had the hammers lacquered to bring out the top end, would work great for a pop track, but not as well on a jazz recording. If you have an instrument that is very bright sounding, then shelf down some of the high frequencies as mentioned above, or bring out some of the bottom end by adding 100 to 250 Hz on a Q of 7 to 10 to balance the bottom end with the extended top of the instrument. When boosting low frequencies, one caveat is that the dampers mentioned above have a low-end component to them and adding too much bottom will add a pronounced “thump” to your track every time the player uses the sustain pedal.
COMPRESSION, ANYONE?
When the piano is uneven in volume, compression can be used to tame the peaks and dips. When choosing a compressor, keep in mind that the type you pick will determine the sonic outcome. An opto-compressor will have a lazier attack and release — the perfect thing for a sparsely played part without a lot of peaks, such as comped chords. If the track is busy and played with a more percussive touch, then use a FET-based compressor that has the ability to respond more quickly to transients. This will have the effect of biting down harder on the transient, keeping it from jumping out of the track because the compressor is grabbing the peak quickly and then releasing it quickly enough to grab the next peak.
Start by setting an easy compression ratio of 2:1 and set your attack and release based on the song tempo and density of the mix. An attack of 17 to 20 ms and a release of 75 to 150 ms will clamp down harder on the attack than an attack of 30 to 60 ms with a release of 200 to 350 ms or higher. For the best results, use your ear and set the attack and release so that the compressor won’t pump, but will instead act as a dynamic traffic cop, keeping your part from popping out and covering other mix ingredients. You can also use compression boldly as an effect. For instance, the piano in “Lady Madonna” is heavily compressed but it is a featured instrument, so the song can afford to carry a heavy-handed approach.
AMBIENT CHOICES
When making reverb decisions, the musical style and arrangement shape your choices. If there are a lot of other sustained instruments such as strings, sustained guitars and background vocals, then there will be less room for a piano with a lot of reverb. If the mix is sparse, then there will be an abundance of open sonic space to fill with trailing reverb tails.
As for your approach, a brighter reverb might not be the best choice in a moody jazz track, but would be perfect for a densely layered pop track where you need your part to cut through the masses. Your choice is sometimes right in your face: If the piano is supporting the melody and comping chords, add just a touch of the same reverb you’re using on your vocal or lead instrument track. Using a lighter effect keeps the piano’s added ambience below the other players, making it less dominating.
On the other hand, if you’re selecting a reverb for a solo piano track or the piano is playing a central role, then use the “best” ambient partner in your arsenal — that is, one with a low noise floor, and a lush and detailed reverb tail with lots of control over parameters, such as early reflections, pre-delay and high-frequency cut. A good starting point is a preset with a description that matches your sonic goal, such as Dark Plate or Bright Room.
Next adjust your room size and pre-delay to match your song’s tempo. A tempo of 100 bpm or more cannot support a longer tail with a lot of pre-delay, while a ballad with a legato melody can support a ‘verb with a long hang-time of 1.5 seconds or more with a pre-delay of, say, 120 ms. RT60 parameters can show up as decay time in seconds or in the actual size of your virtual space in feet or meters. Start with a 1-second or 25-meter-room setting and listen to the effect in your track. Remember that pre-delay makes your reverb more dominant in the track by leaving a “dry” space before the reflections kick in. This parameter works especially well with piano because of the percussive nature of the instrument, giving it a unique and dramatic soundstage. Keep your tempo in mind when setting it up: The faster the tempo, the shorter the pre-delay. For a ballad or slower tempo, start at 120 ms and work back from there, shortening the delay if the song is faster.
The darkness or brightness of your reverb is represented by high-decay cut parameters. The most natural effect is when you roll off your reverb starting at 5 kHz, where it happens due to the laws of physics in a natural ambient space. Make your reverb brighter by extending this parameter up to 8 kHz or beyond. Another way of brightening your reverb is to put an EQ across the send. Use a shelf EQ starting at 5 to 7 kHz to achieve the same effect as boosting your high-decay parameter.
Fine-tuning your piano track with the techniques described here will help you craft an ideal mix, no matter what style of music you’re working on. Make reverb, panning and EQ choices in the context of the rest of your mix to perfect that piano sound.
Kevin Becka is Mix’s technical editor.

To keep the piano image stable, try narrowing panning when the player reaches for extreme high and low notes.
Illustration: Chuck Dahmer
POWER TIP
ADD FOCUS WITH DYNAMIC PANNING
Because of the sheer size and range of the piano, the image can shift dramatically from one side or the other as the player moves around the keyboard. This can cause a distracting shift of the listener’s attention from left to right, especially if the piano is panned wide. This see-saw panning effect is dependent on how the instrument was recorded. For instance, on a track that has been recorded with a spaced pair of microphones positioned right over the hammers, the image can be less centered than a track that was recorded with an X/Y pair pulled back four feet from the instrument. So recording engineer, beware: Even though you’re getting an intimate picture of the instrument with mics placed up close and personal, you’re also getting an exaggerated stereo picture. Nobody listens to a piano with their ear five inches off the hammer, yet that’s the way a lot of instruments are recorded.
With that in mind, when the player is shifting ranges radically and you feel your lack of center becoming a sonic distraction, momentarily rein in the drifting part by automating the panner in your DAW. For example, let’s say that the solo is played mostly in the middle section of the instrument but the player reaches out to the left for the occasional low accent note. This is where automated panning can lessen the sensation that the instrument is unnaturally large in the mix.
For starters, find the position where the stereo image sounds good overall and write that throughout the track as a foundation. Then with the left and right panner in auto-touch — meaning if you let go, it will revert to the previously written foundation pass — go through the tune and pull in the image when it gets too far afield. Your panning alteration could be just one side if it sticks out, or both if the player goes wide with both hands. Remember that if you’re too emphatic in your moves, it will sound distracting. By writing the panning in this way, you will give yourself the best possible balance for your instrument in the mix: The image will be wider when the part is more centered, and centered when the part is leaning more to the left or right.
— Kevin Becka

To increase isolation, face the piano’s open lid away from other instruments; add gobos for additional separation.
Illustration: Chuck Dahmer
BEFORE YOU MIX
MINIMIZING LEAKAGE IN THE TRACKING ROOM
When recording piano, bass and drums in a minimal space or when the band insists on being in the same room for the best lines of sight and optimal live/studio performance, leakage is a major concern. For the engineer who is recording piano, it’s a fight between tone and isolation, especially with drums. Luckily, there are numerous techniques to help you win this battle.
One solution to keep drums out of the piano mics, and vice versa, is to “bag” the piano — shutting the lid and covering it with blankets or the piano’s own cover. However, now you’ll have to set up your mics in the tiny space inside the piano, which doesn’t give the instrument a very “open” sound because your mics are stuck inside a small wooden box with a lot of sonically competitive reflected energy. Sometimes recording this way is unavoidable for aesthetic reasons; for instance, if you’re recording during a video shoot. If you need to record with the piano closed, then try products made for this purpose, such as DPA’s 3521 compact cardioid stereo kit, Earthworks PianoMic or the Schoeps CCM 4 compact microphone with the MK4 cardioid capsule.
One trick that will get you some degree of isolation but a more open sound is to face the open lid of the piano away from the other instruments. Placing the lid between instruments lets you use it as an acoustic barrier between your players. And a group of gobos placed between the drums and piano can help reduce crosstalk.
Although it sounds counterintuitive, put as little space between the players as possible to minimize leakage delay: Leakage from afar creates a slapback effect, as opposed to the shorter, more usable decay that resembles room ambience and occurs when instruments are closer together.
— Kevin Becka
TROUBLESHOOTER
HEY! NO PEAKING
During our “Inside Track” series, we’ve talked a lot about the concept of automated EQ. When mixing piano, this versatile tool gives you ultimate control over the extreme tonal range of this complex instrument. The problem you’re trying to solve is this: As an arrangement develops in power throughout a track, the EQ settings, or lack thereof, that worked at the front of the tune may rip your face off at the end as the player hits the instrument harder. This is where automation is a powerful tool to help keep these peaks in check.
For instance, sometimes a player will groove in the track and then come down and hit a hard low note for an accent. In this case, if you’ve added 300 Hz to bring up the warmth of the overall track, it will stick out, sending a peak of sonic energy across your mix. To counter this buildup, automate the gain setting at 300 Hz and dip it to match the player’s move. This may be something done in stereo across the left and right side of the piano, or as a multi-mono plug-in where you just dip the left side (players mix perspective).
Reverb can also get out of control in the low end or need a boost at the extreme high end of the spectrum as the track develops. In this case, automate your send, setting a foundation where the reverb works across most of the track and then make a pass and pull it back when low energy builds up and hits the reverb too hard or give it a boost when it thins out at the top. By dynamically controlling your reverb send, you’ll maintain an overall smoothness to the ambient treatment of your piano track.
— Kevin Becka

LISTEN: Must Play
A podcast with Erik Zobler who has engineered for pianist/composer George Duke
READ:
More information on “Recording the Band”
Related Articles
Inside Track: Mixing Strings
Inside Track: Mixing Strings
The Inside Track: Mixing Vocals
Speech and Song
Hellacious Horns
Killer Keys
Guitar Greatness
Percussive Perfection
LISTEN:
Audio clips to help your mix sing!
SPEECH AND SONG:
Click on links below to download .WAV files to hear the New Camaldoli project, recorded by Kevin Becka and Glen O’Hara, in surround.
These four .WAV files (labeled accordingly) should be panned discretely to LF, RF, LS and RS speakers with the levels set to nominal for all four channels.
PERCUSSIVE PERFECTION:
Click here to download .WAV files of a Grado Vectored Array recording, a Holophone recording and a clip of Tony Morra’s drum sound, and hear an MP3 clip from Skid Row’s self-titled debut, as featured in our sidebar, “Michael Wagener, Skid Row and a Really Big Tracking Room.”
