In order to stay competitive, digital audio-sequencing programs must be continually updated and upgraded. Generally, keeping track of the latest revision is easy enough if you check for posted updates and revisions. However, Steinberg has broken with tradition with the latest incarnation of its flagship application, Cubase VST. The company reports that Cubase SX, as the new software is dubbed (SX doesn’t actually stand for anything), is so named because “Cubase SX is not an updated Cubase version; it is completely redesigned.” Though many of the program’s windows and commands will be familiar to Cubase users, there are many redesigned interfaces and a seriously revamped audio engine.
Cubase SX retails for $799. (An SL version, which lacks the more advanced auto-mation, surround and score features of Cubase SX, is $499.) For those of you who keep track of Steinberg’s product line, Cubase SX takes the place of Cubase VST/32 and Cubase Score, and Cubase SL replaces Cubase VST. At the time of this field test, both versions were only shipping for PC, but by the time you’re reading this, Mac versions should be available. Upgrades from Cubase VST Versions 5.x to the new Cubase cost $149, and Steinberg also offers crossgrades. (For example, going from Emagic’s Logic Audio to Cubase SX is $299.)
Minimum system requirements are somewhat heavy-duty: On a PC, you’ll need a PIII 500MHz processor with 256 MB of system RAM and Windows 2000 or XP. For a Mac, you must have a G3 350MHz processor with 256 MB of system RAM and OS X. (An upcoming release will require OS X.2.) Both SX and SL work with Steinberg’s VST System Link system to interconnect multiple computers via ASIO soundcards and standard digital audio cables for more DSP power. Between the minimum system requirements and VST System Link, Cubase SX appears to be well-prepared to handle a future full of more CPU-hungry plug-ins and infinite track counts.
For this field test, I installed Cubase SX Version 1.0.1 in an AMD Athlon XP 2000+ (1.6GHz) computer (which was graciously loaned to me by AMD), running Windows 2000 and packing 262 MB of system RAM. Audio and MIDI I/O were handled by Tascam’s US-224. And, though I had some problems using it as a control surface with Cubase SX, the bugs I ran into are reportedly fixed in Version 1.0.2 and higher.
WINDOWS TO YOUR PROJECT
Cubase SX looks strikingly different from Version 5.x. Its color scheme is decidedly lighter, with more gray tones, making for an appearance with less contrast. There is a ton of new controls and information fields that can be a little overwhelming at first glance. Quick keys to recall screens and provide access to commonly used functions are liberally dispersed throughout the program. Inspector tabs and lots of scalable control areas are now integral parts of the tracks and mixer channels, and most control elements (like faders and knobs) have been redesigned to look cooler and work more smoothly. The interface changes are very well-implemented and go a long way to make Cubase SX the most user-friendly and intuitive version of the Cubase line.
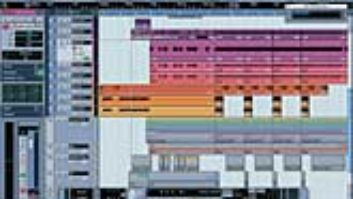
The concept of songs and arrangements has been dropped and replaced with the more streamlined and practical project file. In keeping with this change, the screen that was previously called the Arrange window is now referred to as the Project window (see Fig. 1). Multiple projects can be opened at the same time, so the old arrangement file scheme is unnecessary. Cubase SX can import 5.x song, arrangement and part files.
The Project window has many new features that give it big advantages over the old Arrange window. For example, a global view of your entire session can be opened above the tracks; it is wonderful to reference your relative location within the session, especially when you’re zoomed way in on editing tracks. An information bar (called the Event Infoline) can also be expanded above the tracks, displaying the stats (such as start, end and length) of your currently selected object. Right-clicking on the timeline just above the Event display (where all of the audio and MIDI objects reside) lets you choose the timeline’s units (bars and beats, seconds, samples and six different SMPTE rates).
To the left of the Event display are the Track List and Track Inspector. Although the fundamental idea behind these sections is the same as before, they have been thoroughly redesigned to present more information in about the same amount of space. Each Track tab has its own activity meter and can be expanded to show much of the same information found in the old Track Inspector (such as MIDI channel, patch name, record status, solo and mute). If this is all of the information you need to see, then there’s no need to unfold the Inspector. But, if it’s more control that you want, the Inspector has multiple tabs that provide access to, among other things, most of the mixer’s features (like inserts, sends, EQ and even the selected track’s mixer fader). With all of this control so close at hand in the Inspector, there is less need to jump between the Project and Mixer windows.
SHAKE, MIX AND AUTOMATE
The mixer does not look like the old 5.x mixer, and the changes are much more than just superficial. You can still select the types of channels you want displayed (audio, groups, MIDI, VST Instruments and ReWire tracks), but the mixer is now laid out more like a traditional console (see Fig. 2). Above each channel you can choose to display either EQ, inserts or send controls. And on the left side of each fader are keys to reach Inspector-type functions and bypass the EQ, inserts or sends. The controls above a fader can be hidden, making the mixer look more like the old VST mixer, and the faders themselves have been narrowed to conserve space. In the narrow view, many of the quick keys that were previously on the left are repositioned above the fader. (The EQ, insert and send controls are not shown in the narrow view.) If you prefer the old method of editing a channel as its own separate module, this is still possible if you click on a channel’s Edit key.
Cubase SX’s automation features are comprehensive: Almost every para-meter of the mixer channels, effect plug-ins and VST Instruments can be automated. There are three auto-mation modes: Touch, Latch and a unique function called X-Over, which operates like Latch but automatically turns off when an existing automation move is crossed. The only mode that seems obviously missing is Trim. Read and Write automation keys have been added to the top of VST effects and Instrument plug-in screens, which makes automating plug-ins a real breeze.
Automation curves can be viewed and edited in the Project window. However, rather than overlaying all of the automation curves right on top of the audio waveform or MIDI notes as in other programs, each automation curve gets it own event display track. Audio and MIDI tracks can be unfolded to show their associated auto-mation tracks. The exceptions to this rule are VST Instruments, whose automation data is kept separate from the instrument’s MIDI track in a dedicated VST Instruments Automation track folder (which is also visible in the track list). With the Pencil tool, you can draw automation curves directly in the automation tracks. Periodic shapes have even been added to the Pencil’s palette, opening up the possibility of creating cool rhythmic automation performances — very nice.
It is certainly convenient to give each automation track its own event display track. You don’t have to dig through layers of automation tracks to get to the parameter you want to tweak. Multiple automation curves can be viewed and edited simultaneously as easily as you would edit a stack of MIDI tracks. But on the flipside, it’s easy to end up with too many tracks open and find yourself staring at a really confusing track list. I can see Cubase SX’s automation paradigm driving some people batty, but ultimately, I don’t think anyone can argue with the fact that it’s powerful and gets the job done.
BIG AUDIO TRICKS
Unlimited levels of undo/redo have been added. You can use standard key commands to execute undo/redo, or work directly from the Edit History window where you’ll find a list of all your edits since the project was opened. In this list, you can undo/redo sequential groups of edits by simply clicking where you want to be within the history — very cool.
Offline file, or “file-based” processing, is available. All of your VST and DirectX plug-ins can be used, as well as a handful of stock utilitarian algorithms (like Normalize and Phase Reverse). There is even a dedicated undo/redo function for offline file processing. In the Offline Process History window, you can choose which effect you want removed from the audio file. An effect can be removed from the middle of the history and even replaced with a different effect. (Any element can be removed at any time, even after saving and shutting down the machine.) This is an amazing function that seems tailor-made for sound designers and producers who prefer to work with processed audio files instead of stacks of inserts.
Cubase SX has its own built-in loop-recycling machine, which is strangely reminiscent of Propellerhead’s ReCycle. From within the Sample Editor, a loop can be sliced up using markers called Hitpoints. Hitpoints can be dropped into the loop automatically with a sensitivity slider, and they can be individually muted and moved. With the Hitpoints assigned and the bars, beats and time-signature fields filled in, the loop’s tempo can be conformed to the project tempo without the user changing pitch or employing time compression/expansion — just like a ReCycle file. Hitpoints are handy to have right in the program, but don’t expect them to replace ReCycle. ReCycle file formats (.REX and .RX2) are still supported.
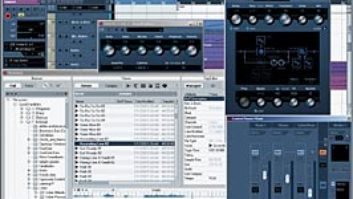
Surround sound is now implemented for standard formats, including quad, LCRS and 5.1, as well as a couple of 5.1 derivations. The mixer has surround panners available on its channels (see Fig. 3), and third-party effects plug-ins that conform to the standard surround formats are reportedly compatible. Steinberg says that Cubase SX’s surround “support goes all the way through the audio path.” I take this to mean that surround sound functionality is not simply a feature that has been tagged on after the fact, but something that has been written into the very core of the program.
The TrueTape saturation and Apogee UV-22 dithering features are still integral parts of Cubase SX. The UV-22 algorithm has been upgraded to HR specifications.
PLUG-INS OF MANY FLAVORS
All of the original Cubase VST effect plug-ins come stock, and Cubase SX also includes several very cool new effects. (See sidebar, “New Stock Plug-Ins.”) My favorites are StepFilter, a filtering effect with an onboard step sequencer that controls the amount of cutoff and resonance; and Vocoder, a vocoder effect whose carrier wave can be controlled by an external sound source, MIDI notes or a combination of the two. Both of these effects are perfect for dance music production and sound-design duties. Most plug-ins have useful presets that, even if you don’t like them, are at least a good place from which to start programming your own effect.
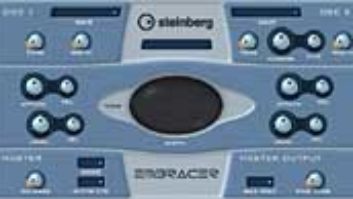
It was a long time in coming, and no doubt due in part to some pressure from the competition, but Version 5.1r1 (the last Cubase VST version to be released) finally introduces new stock virtual instruments (the CS40 and JX16 polyphonic synthesizers). Thank goodness, because the Neon, LM-9 and optional VB-1 (which has been posted for free download on Steinberg’s Website for ages) were getting pretty stale. Cubase SX adds one more polyphonic soft synth to the pot, the A1. It’s powered by Waldorf technology, sounds darn good and has a ton of useful presets. The LM-7, a 12-pad version of the LM-9 drum machine, and the VB-1 with a redesigned face also come stock. Virtual Instrument patch selection has been much improved with the inclusion of a Preset window, complete with a navigation bar that pops up when you click on a track’s Inspector program field. Latency will, of course, depend on your soundcard, but setting the US-224 control panel’s system latency setting to 256k yielded very playable results.
MIDI effect plug-ins have always made perfect sense to me: insert them on a MIDI track like you would insert an audio effect plug-in on an audio track. MOTU and Cakewalk have had this feature in their digital audio sequencers for some time. I’m happy to report that Cubase SX also sports MIDI effect plug-ins. Up to four plug-ins can be inserted on a track (four can also be used as send effects), and there are 14 stock plug-ins. My personal favorites include Arpache 5, a very flexible arpeggiator, and Step Designer, a step sequencer that’s perfect to control soft synths in order to craft funky stepped patterns.
AND MUCH MORE
With the exception of the MIDI effects plug-ins, the MIDI features remain relatively unchanged. However, there have been some nice improvements in terms of functionality. For example, the Key Editor’s interface has been redesigned and now appears less busy, which makes it a much more pleasant editing environment. The Tempo Track editor has been similarly redesigned. Drum maps are easily created and assigned to tracks because they can be used directly through a MIDI track’s Inspector. And several MIDI tracks can be quickly armed for recording if the user simply holds down Shift and selects multiple tracks.
Cubase SX has a comprehensive window set memory feature. Window Layouts, as they are called, can be saved, named and instantly recalled via key commands. (Layouts 1 to 9 default to Alt+keypad 1 to 9.) The ability to save and recall window sets can be a real time-saver, especially if you’re used to the old Cubase menus and window organization; use the Window Layouts and avoid hunting and pecking for screens. New access screens include a window that lists all of the Device panels (such as the VST Instrument or VST Send Effects rack) and a Plug-In Information dialog from which you can manage your plug-ins.
Left- and right-clicking in the project window’s timeline to set the loop points (PC only), a convenient function in previous versions of Cubase, has been dropped. Now you can highlight a part and press “P” on your computer keyboard to set the loop points. This is also a convenient way to set loop points, though it may take a minute to get used to if you’re stuck on the old way of doing things. (You can also Control-click and Alt-click on the timeline to set the left and right locators, respectively.) The main timecode display of the Transport bar is independent of the timeline’s units. This is good because it lets you monitor two different time values simultaneously. (For example, bars+beats in the timeline and SMPTE in the main display.)
TRIPLE SX
There’s no way I can cover all of the cool things about Cubase SX in the space available, such as the improved Score features and the built-in Beat Calculator. Suffice to say, Cubase SX is a vast improvement over Cubase VST. It addresses its predecessor’s poorly implemented automation and organization problems on a fundamental level, and then adds its own basket of cool tricks to the Cubase equation. The Project and Mixer windows are well-conceived and implemented, and there are lots of useful new dialogs that help make the program a breeze to use. The developers at Steinberg have clearly listened to their users — impressive.
With so many great plug-ins, virtual instruments, VST System Link compatibility, a well-designed interface, lots of professional editing and synchronization features, and a solid build (it only froze up on me once, which isn’t bad for Version 1.0.1), it’s tough to find anything to complain about with this software. The automation windows can get cluttered, but this is pretty minor when you look at the big picture. If you’re a dedicated Cubase user, and even if you aren’t — perhaps you’re trying to decide which digital audio sequencer you want to invest in — you owe it to yourself to check out this program.
Steinberg North America, 9200 Eton Ave., Chatsworth, CA 91311; 818/678-5100; fax 818/678-5199; www.steinberg.net.
Visit Erik Hawkins’ record label at
www.muzicali.com.
NEW STOCK PLUG-INS
Bitcrusher
DaTube
De-Esser
Dynamics
Effects Plug-Ins
QuadraFuzz
Reverb A
Ringmodulator
Rotary
StepFilter
Symphonic
Vocoder
Virtual Instruments
A1
LM-7
VB-1
MIDI Effects Plug-Ins
Arpache 5
AutoPan
Chorder
Compressor
Control
Density
Micro Tuner
MIDI-Echo
Note 2 CC
Quantizer
Step Designer
Track Control
Track FX
Transformer
